Saturday, 29 June 2013

How do JavaScript closures work?

Whenever you see the function keyword within another function, the inner function has access to variables of the outer function.
function foo(x) {
  var tmp = 3;
  function bar(y) {
    alert(x + y + (++tmp));
  }
  bar(10);
}
foo(2)
This will always alert 16, because bar can access the x which was defined as an argument to foo, and it can also access tmp from foo.
That is a closure. A function doesn't have to return in order to be called a closure. Simply accessing variables outside of your immediate lexical scope creates a closure.
The inner function will close-over the variables of foo before leaving.
Consider another example:
function foo(x) {
  var tmp = 3;
  return function (y) {
    alert(x + y + (++tmp));
  }
}
var bar = foo(2); // bar is now a reference to the closure returned by foo
bar(10);
The above function will also alert 16, because bar can still refer to x and tmp, even though it is no longer directly inside the scope.
However, since tmp is still hanging around inside bar's closure, it is also being incremented. It will be incremented each time you call bar. As a result of this it will alert 17 the second time bar(10) is called, 18 the third time, etc.
(Note for your 6 year old: It is possible to create more than one closure function, either by returning a list of them or by setting them to global variables. All of these will refer to the same x and the same tmp, they don't make their own copies.)
Edit: And now to explain the part that isn't obvious.
Here the number x is a literal number. As with other literals in JavaScript, when foo is called, the number x is copied into foo as its argument x.
On the other hand, JavaScript always uses references when dealing with Objects. If say, you called foo with an Object, the closure it returns will reference that original Object!
function foo(x) {
  var tmp = 3;
  return function (y) {
    alert(x + y + tmp);
    x.memb = x.memb ? x.memb + 1 : 1;
    alert(x.memb);
  }
}
var age = new Number(2);
var bar = foo(age); // bar is now a closure referencing age.
bar(10);
As expected, each call to bar(10) will increment x.memb. What might not be expected, is that x is simply referring to the same object as the age variable! After a couple of calls to bar, age.memb will be 2!
This is the basis for memory leaks with HTML objects, but that's a little beyond the scope of this, ahem, article, ahem.
Friday, 28 June 2013

WeChat for PC : Web WeChat on Windows/Mac/Chrome OS

Smartphone have captured the mobile market with almost everyone using it. The most popular apps on smartphones are the ones related to social media or communication (the way you can connect to your loved ones). These includes applications like Viber (Voice Calling), Tango (Video Calling), Whatsapp (Instant Messaging), Hike (SMS Text Messaging) and WeChat (which combines all features). Most of these apps are supported for all mobile platforms be it Android, iPhone, Windows or Blackberry, however most of these apps do not have any support for usage on your laptop/computer/PC.

Today we will be discussing about using WeChat application on your personal computer (or for that matter any computer having internet connection). Interesting thing is that you do not require to download WeChat application on your Pc and still use the app features. We are referring to the app feature named "Web WeChat".


WeChat for PC : WebChat

Requirements

1. You need to have a smartphone where you have already installed WeChat app. The app is linked to your mobile number (so unless you haveWeChat on your phone, you won't be able to use it on PC).
2. Computer with internet connection.
3. Internet browser (Firefox/IE/Chrome/Opera) all works.

How Web WeChat Works

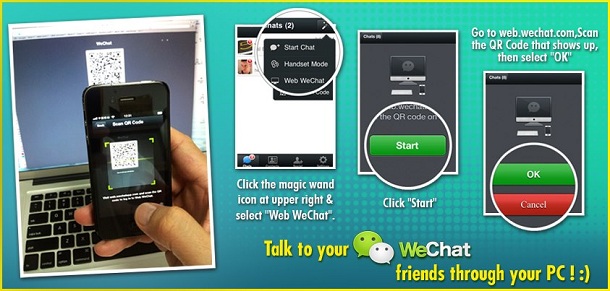
1. Click the magic wand icon at upper right and select "Web WeChat".
2. Click "Start"
3. Open the browser and open web.wechat.com
4. Scan the QR Code that shows up when you open your PC browser to web.wechat.com, then select "OK".

Once you are on Web WeChat, you can continue chatting with friends on your browser. It is like accessing your phone WeChat account on your computer (simply assume that you have a phone on your screen). It works pretty great.

The main advantage of using this feature is ease of use. It is quite easy to chat with friends (type) on computer than your computer. We have seen in the past that people crave about using Whatsapp  on computer. They do not have any PC application nor do they support such a web chat feature. Only option for Whatsapp is to follow our tutorial (userguide on using app on PC using android emulator).

Viber For PC : How to Downalod and Install Viber on Computer | Viber PC App

Why don't we have any official Viber for PC application yet. Why is there any need for such tutorial on Viber PC application. These questions certainly need to be answered by the Viber team. We talked about their mobile voip application for iPhone, how you can use Viber to make free mobile calls. Since it has only launched its iPhone application, Android Application and Blackberry App (with some limited features), the wait for viber app for computer is getting longer!

Viber is certainly one cool application that everyone should have in their iPhone. Almost all those having a smartphone, use internet on their mobile phones. So, what if everyone start using 3G and thus, Viber on their smartphones. Then you can easily talk to each other for free and make free calls. That's certainly possible now :)

But what about those not having a smartphone, but still want to talk to their friends (on their iPhone) using Viber. I think it should soon launch their PC app. Please share your views on this. Do you really require Viber PC application or are you satisfied using viber only on your mobile!

Also a lot of people while on their computer, want to access everything from pc only. Who doesn't like to do the job of mobile from their laptop itself (off course vice versa is also true). I guess Viber should soon officially launch its PC application. But till the time it launches its official app for PC, lets see a way by which you can use Viber on your PC.


Viber for Android Mobiles

Viber has launched its Android app as well, however its computer application is still not officially out. Viber people keep on saying that it is still under works and will officially be out very soon. I would rather figure out a way to use Viber on my PC then to wait for it! 

Download and Install Viber for PC using Android Emulator

Before we go into details on how to install viber for pc, lets see how do we get this working in concept. Google Android allows you to run an emulator for PC, which is a simple application running on your PC and the applications works on PC as if its a android mobile.

You can run any android application on this emulator. So we are suggesting for now (till viber for pc is officially out) is to install android emulator on PC and run Viber application on this emulator.

What do you need to run Viber on PC using android emulator :
  • Google Android account, this is basically an google account (gmail works). 
  • Install android sdk on your PC.
  • Download Java on your computer if not previously installed. Follow this link.
Going step by step : Viber for PC requires Viber Android app on emulator, android emulator on PC require java on your computer.
  • Step 1 : Install Java on computer
  • Step 2 : Install android emulator.
  • Step 3 : Install Viber apk on Pc using emulator.
Before proceeding make sure you have android emulator on PC.

Update : Well initially I asked my readers to search on internet installing android emulator on PC. Many people were able to get the android emulator installed on their PC. However they were not able to download Viber android app. So once you have installed android emulator, all you need is Viber Android Apk. Download Viber Android Apk for Free : Download link.

It turns out people have faced difficulty in finding good tutorials for that. So let me post some tutorials. Tutorial on how to install android emulator on PC : so as to Download and install viber app on PC : Follow this link

Update : Well, a lot of our readers appreciated our efforts when they got this thing installed on PC. However few readers were still finding difficult to install Viber app on their computer. They have asked us several times to post a step by step tutorial ourself. Finally we decided to post the tutorial here itself, with some screenshots (wherever necessary).


Step by Step Tutorial to Install Viber Application on Computer

  • Make sure Java is installed as explained above.
  • Download Android Emulator and Install this emulator on your PC. Simply download from this link and double click to install it.  
Installing Android SDK Tools
  • It will check for which Android OS to install on your PC. Choose the latest "Android 4.1 (API 16)" and click on install package. On the new window that pops up, select accept all and install. 
  • It may take some time (about 20 mins, depending on internet speed), so relax while it gets installed!
Step 2 : Android Emulator on PC
  • After Android OS emulator has been installed. Click on "Tools" Option, and select "Manage AVDs".
  • A new window will pop up. On the right hand side (as explained in image), click "New". AVD is simply Android Virtual Drive (or android emulator drive on computer).
  • In the target option, select the OS package which we just download. In this case "Android 4.1", select installer package size as "512". Click "Create AVD". Accept everything (ok) in the pop up window.  
 Creating Android
 Image on Disk
  • Select AVD Manager and select the AVD which we just created. "Click Start".
  • Click Launch in the pop up window.
  • Android OS will start on your PC. It is much like the android mobile on your computer with screen and keyboard.
 Install Android 
Apps on Comp
  • Enable Wifi : Menu then Settings then Wifi then Enable Wifi.
  • In the android emulator, start browser. Visit www.viber.com.
  • Install the Viber Android App from Viber website. This will install the app on your emulator. Otherwise use above viber apk link to download this app.
 Viber Installed 
on my computer
  • Once Viber App is installed on your computer, it is simply registering with Viber and verifying your account. Follow the steps as explained below (Verifying Viber PC account).
So will the help of above tutorial, I can assume that you have got the viber app installed on your PC. Well if you are still facing any difficulty in downloading and installing viber pc application, then please let us know. We will try our best to help you out!

This way you have got your Viber for PC app installed on your PC. Lets see the how to get this viber app running on your computer :

Verifying your Viber PC Account

So as to Viber running on PC and start making free calls.
  1. Download and install Viber app on PC using android emulator as explained above.
  2. When asked for your number, enter your regular mobile number, then confirm. 
  3. An SMS message with the code will be sent to your mobile phone. 
  4. Take that code and use it in your viber pc app. Viber will then be activated, and you're good to go. This means that if anyone dials your number on Viber, you will get the call on your PC.
Again, If you still face any problem installing Viber on your laptop or your computer, please let us know. We will try our best to help you out. We have tried ourself and both SMS and calling works great!

I would appreciate if any Viber official can let us know about the status of their pc app. Lets just hope that Viber PC App is officially out soon.

How to Format External Hard Drive to FAT32 in Windows

Trying to format a large external USB or Firewire hard drive to the FAT32 file system? Can’t do it? Only see an option for formatting the drive using the NTFS file format? Well if you answered yes any of those questions, then you’re at the right place.
I was recently trying to format my 1 TB MyBook external hard drive in Windows XP to FAT32 instead of the overly forced-upon NTFS format. Why? Well because I needed to connect it to a NAS device and the NTFS permissions were causing the NAS not to be able to access the drive. Simple solution is to use FAT32, no security, no problems. Though it’s sometimes useful to format a USB drive in NTFS format.
Also, formatting a drive in FAT or FAT32 will allow it to be read by other operating systems, such as Mac, Linux, and older versions of Windows such as Windows 98.
Unfortunately, Windows XP and Windows Server 2003 will only format a removable drive in FAT32 if it’s less than 32GB! Hmmm…that pretty much cuts out ALL modern external hard drives!
However, Windows can format a drive that is larger than 32GB in FAT32, but you have to use the DOS command prompt. However, if you have a drive that is 1TB or larger, you may still get an error saying “The volume is too big for FAT32”.
In that case, you can use some 3rd party programs that will allow you to format an external hard drive with the larger size. Let’s go through the different methods. In case you are having problems getting your external hard drive to show up in Windows, read my article on how to change the drive letter for an external drive in Windows.

Format in FAT32 using Drive-Specific Tools

Before we get into using the command prompt and other third-party programs, it’s worth mentioning that some of the hard drive manufacturers have created their own tools for converting a drive which is larger than 32 GB to FAT32. Here is a list:
Seagate DiscWizard 
Western Digital FAT32 Formatting Tool

Format External Hard Drive in FAT32 using DOS

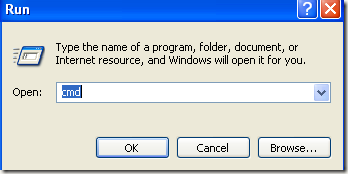
Open a command window by going to Start, then Run and typing in CMD.
command prompt
Now type in the following command at the prompt:
format /FS:FAT32 X:
Replace the letter X with the letter of your external hard drive in Windows. Windows will go ahead and begin formatting the drive in FAT32!
format external hard 
drive fat32
There seems to also be an issue when using the command line besides the size limit problem. Namely, it can take forever to format the hard drive for some users. Not sure why, but I’ve seen it enough times and it can be very frustrating to wait 5 hours and then have the whole format fail. If the format is taking longer than an hour, just cancel it and try one of the methods below first.

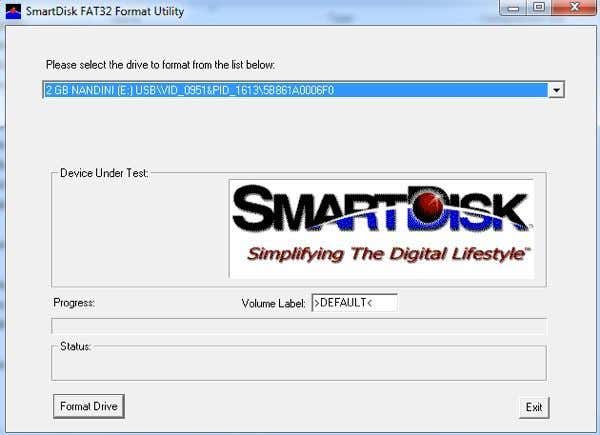
Format in FAT32 using Verbatim SmartDisk FAT32 Utility

There is a free utility called Verbatim FAT32 Tool which will allow you to convert your hard drive to FAT32 in seconds. I use to recommend a program called SwissKnife, which I mention below, but it’s no longer free and no one really needs to spend $10 to convert a hard drive from NTFS to FAT32. There are lots of other free tools and this Verbatim one is one of the better ones.
Just download it, unzip it and run the tool. It’s a standalone EXE file, so you don’t even have to install it on your system. Choose the drive you want to format, give it a Volume name and click Format Drive!
verbatim smartdisk
It’s a painfully simple program to use and it works really well. If you don’t even want to bother with the command prompt, just download this free tool and use it.

Format in FAT32 using FAT32Format

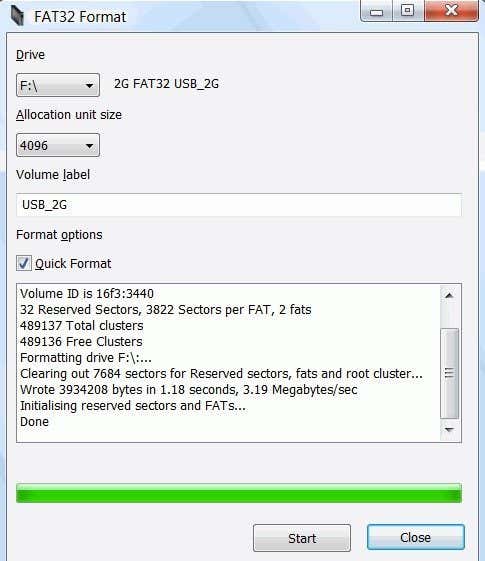
FAT32Format is another free tool you can use to get the job done. Choose the drive, the allocation unit size, give the volume a label, choose whether you want to do a quick format or not and then click Start.
fat32format

I would suggest not checking Quick Format so that way the entire drive is completely overwritten and you’re starting from scratch. I’ve tried this program and it was able to convert my 1TB hard drive to FAT32 without any issues. It did take longer than Verbatim, but I didn’t choose Quick Format, which probably would have been faster.

Format in FAT32 using FAT32Formatter

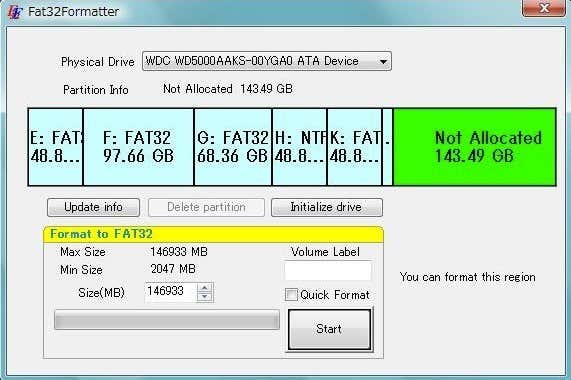
Another option is the FAT32Formatter program from Tokiwa. Using this program, you can see the different partitions on the hard disk and format just one partition to FAT32 instead of the whole drive. It’s probably best not to have a mix of NTFS and FAT32 partitions on one drive, but you can do it if you want or if you need to for some reason. This program will allow you to do that.
fat32formatter

Format in FAT32 using SwissKnife

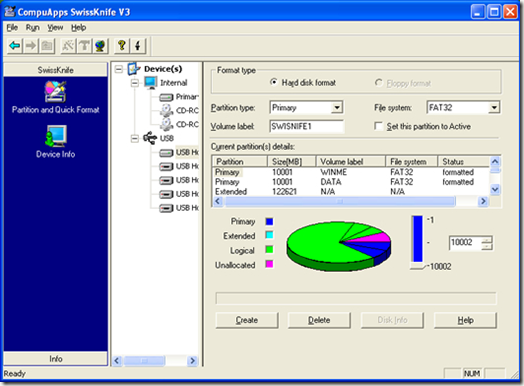
SwissKnife is a nifty little program that used to be free, but not anymore, which you can use to format many types of external drives such as USB, Firewire, PCMIA, SATA and SCSI. The link points to the CNET page, which still has the older free version you can download. You can also use it to create partitions on an external hard drive and it formats faster than Windows.
swissknife
With SwissKnife, you may run into an issue where after the conversion to FAT32, you are left with only a small percentage of the original disk size. For example, if you format a 1TB drive, you might perform the conversion and end up with only 500 MB of space. This can be fixed by first reformatting the drive in NTFS format by performing a quick format.
Once you format the entire drive using NTFS, make sure to view the available space in Explorer and that it matches the size of the hard drive. Once you do that, go ahead and use SwissKnife to perform the conversion to FAT32.
So next time you want to format a hard drive in FAT32 and Windows only gives you an option for NTFS, make sure to follow one of the methods mentioned above. Enjoy!

Top 12 Keyboard Shortcuts for Windows 8

I’m been using Windows 8 for a few months and I’m only now starting to get used to it. The whole Metro UI is taking some time to get acclimated with. Now that I’ve gotten past that stage, I’m looking into making myself more productive on Windows 8 by learning some useful keyboard shortcuts.
windows 8
In this post, I’ll go through the 12 keyboard shortcuts for Windows 8 that I think you should definitely learn. There are literally hundreds, most of which no one will ever use. I’ve already seen several bogs write posts like Top 30 Windows 8 keyboard shortcuts, but that’s way too many for the average user. I pretty much only use 5 to 10 shortcuts on a daily basis. Either way, you can speed things up a little using shortcuts, especially if you have a giant flat panel using super high resolution.
Feel free to post a comment and tell us what your favorite shortcuts are for Windows 8. As we get closer to the final public release of Windows 8, more and more shortcuts will probably be added for various Metro apps, etc.
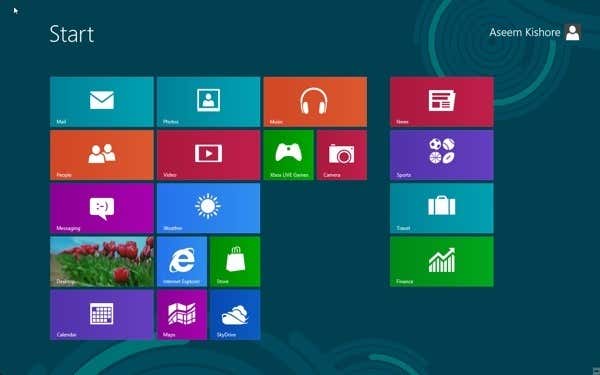
Windows Key – This will bring you to the Windows 8 Start Screen. Doesn’t matter if you are on the desktop or in a full-screen Metro app, pressing the Windows key on your keyboard will slide you back to the main Start Screen. Pressing the key again will toggle you between the start screen and the last app you were using.
start screen

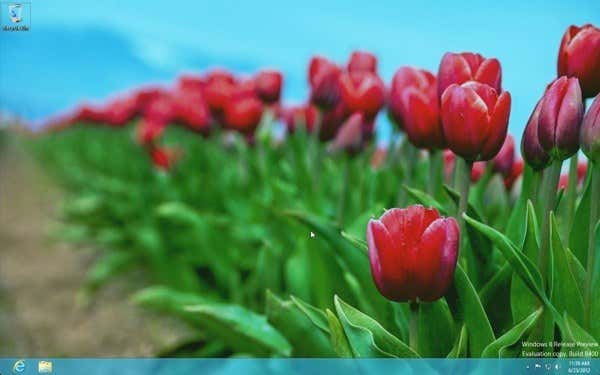
Windows Key + D – Missing the desktop? Hate having to open the charms bar or sliding your mouse to the upper left corner to get back to the desktop? Just press Windows Key + D and you’re back in the desktop.
win 8 desktop
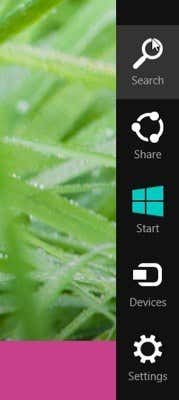
Windows Key + C – This hotkey brings up the Charms bar. The charms bar is basically a “settings” type bar that gives you different options depending on which program you have open. Also, it lets you share something or perform a quick search.
charms bar
Windows Key + E – Opens Windows Explorer. I’m pretty much always messing with files, so this is a very useful shortcut.
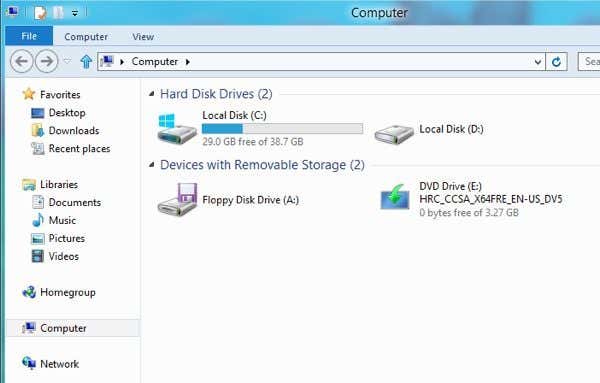
windows 8 explorer
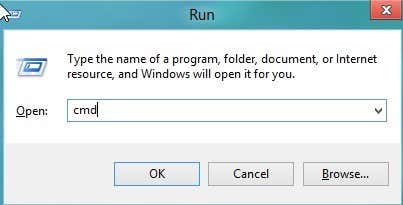
Windows Key + R – Brings up the Run dialog box, which lets you quickly run commands. Also, it’s easy to open the command prompt by using this shortcut, then typing in CMD.
windows 8 run
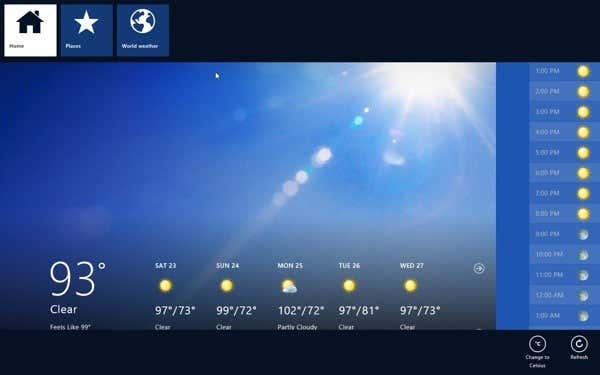
Windows Key + Z - This will bring up the app bar in a full-screen Metro app so you can execute commands.
app bar
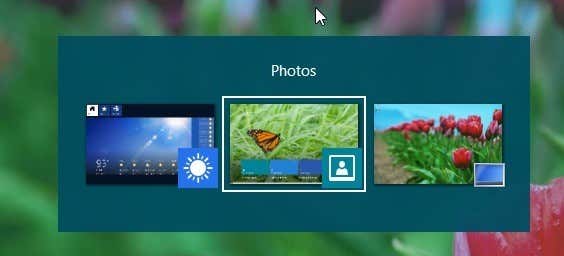
Windows Key + Tab - The same key combination through all versions of Office to quickly cycle through all open apps.
windows 8 cycle
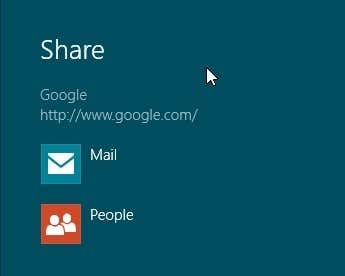
Windows Key + H – This will open the Share charm directly. Now that you will have to use Charms all the time in Windows, learning this one and the next one will make you work a lot faster.
share charm
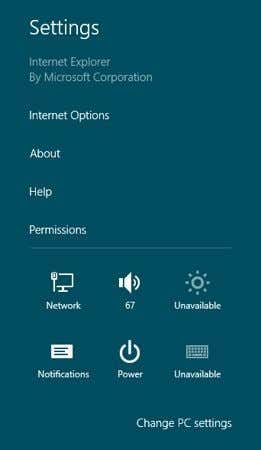
Windows Key + I - Opens the Settings charm directly. The settings charm also lets you turn off the computer and change your PC settings. Yes, you have to go through this charm to turn off a Windows 8 machine!
settings charm
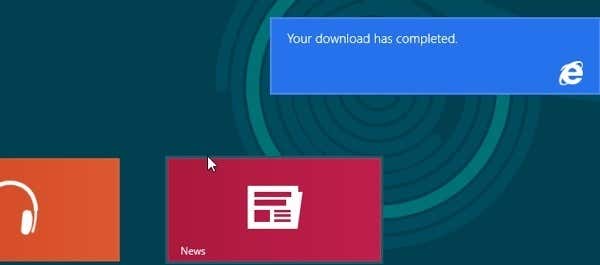
Windows Key + V – Notifications is a new and big part of Windows. You can get notifications for all kinds of stuff including when you get a new email, a download has completed, and lots more stuff.
notifications
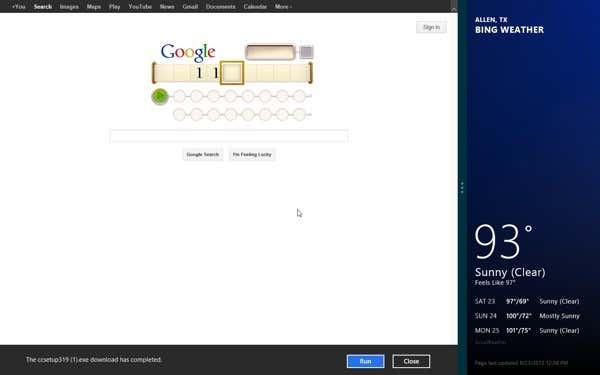
Windows Key + Period (.) – This probably my favorite. You can snap any Metro app to the right or left hand side of the screen and then continue using other Metro apps. This is great if you want to snap your email to the right and then read the news or do something else.
snap metro app
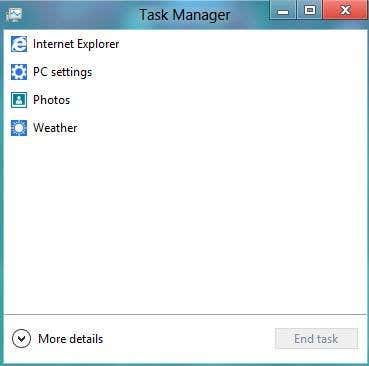
Ctrl + Shift + Esc - This will bring up the new Windows 8 Task Manager. The shortcut is the same as it was in previous version of Windows.
windows 8 task manager
So those are the 12 shortcuts I have found to be the most useful in Windows 8 so far. A lot of them use the Windows Key, so that makes it a little easier to remember too. Tell us what you think! Enjoy!

Create Your Own Customized Tiles on the Start Screen in Windows 8

Looking to do a little customization to the Windows 8 Start Screen? Well, you really can’t do much with the built-in options in Windows 8. You can make the tiles a little larger or smaller and change the overall color scheme of the Start Screen, but that’s about it.
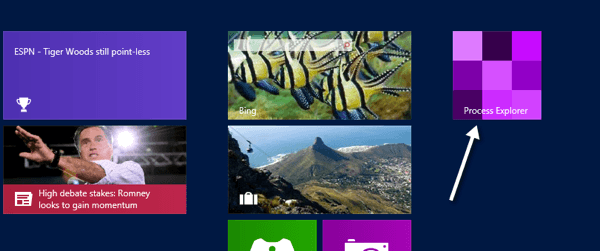
Luckily, someone wrote a nifty tool that lets you create your own customized tile on the Windows 8 Start Screen. For example, I use a program called Process Explorer to analyze processes on my Windows 8 system. I created a custom tile for this and it looks like this:
custom tile windows 8
Sweet huh? You can create a custom tile with your own picture, clipart or whatever you like. You can also have it open any program, file, folder or even a website. So what’s the program? It’s called OblyTile and you can download it here.
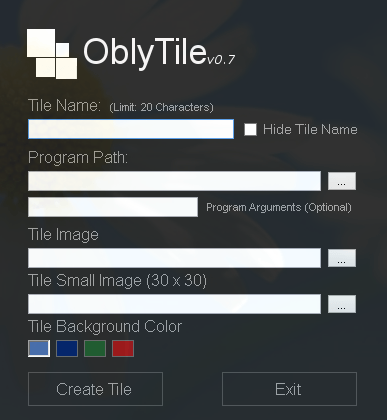
OblyTile is a pretty easy to use program. Once you download it, just run the program, there is no need to install it. You’ll see the following screen:
oblytile
There are a couple of options you have to fill out in order to use the program:
- Tile Name – You have to give your tile a name. You can choose to hide the name if you like, but you still have to give it a name.
- Program Path – This can be the path to an EXE file, a PDF file, a folder, or a website.
- Program Arguments - This is optional, but if you want to pass any command line arguments to your program.
- Tile Image – A 120×120 pixel image for your tile.
- Tile Small Image - A 30×30 pixel image for your tile.
- Tile Background Color - Lastly, you have to choose a tile background color.
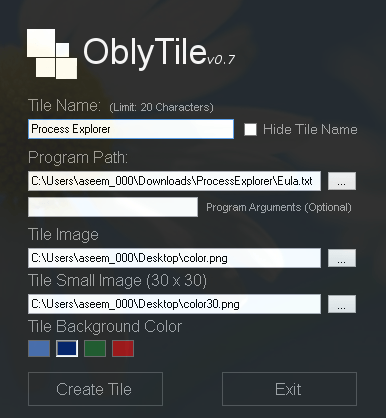
Here’s an example of my creating a custom tile for the Process Explorer program. I apologize in advance for the horrible purple shown above!
new custom tile
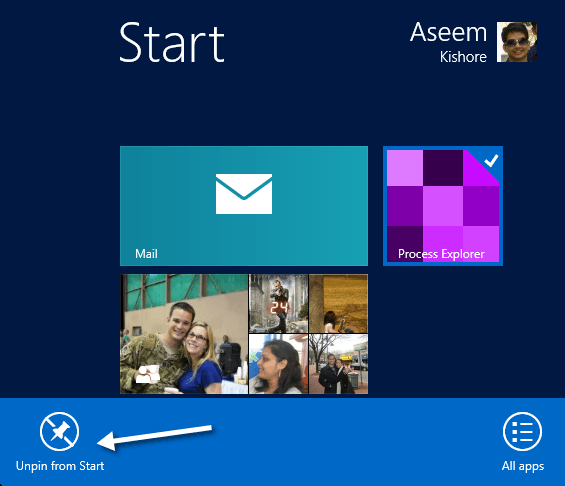
To get rid of your tile, just right-click on it and chose Unpin from Start. That will remove it. Currently, there is no way to re-load a tile you created and then unpinned. You have to go through all the steps again. Not a big deal, but it would be nice if you could load up the previous tiles considering it saves all of them at C:\Program Files\OblyTile.
unpin from start
That’s about i! Overall, a nice program for creating custom tiles that doesn’t require you to know any coding! You can really jazz up your Start Screen with this tool. Also, it just got released so there are bound to be a lot more features in the coming months. Enjoy!